As you play Stymie more and more, you’ll come to realize that formations are essential to any plan of attack, and also the backbone of any strong defensive position. That is how you develop your pieces in this game. Better players will learn to create combinations of formations that can connect stones all around the board, and formulate plans allowing them to expose an opponents vulnerabilities, or thwart the opposition’s plan of attack, seamlessly transitioning from defense to offense or vice versa.
There are four basic formations; the Line, the Diagonal, the Triangle and the Square. The first formation we’ll illustrate is the line
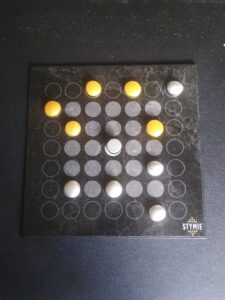
Figure 1
In Figure 1 it’s Silver’s turn, and while both players have 5 stones in play, Gold has a slight initiative advantage as he’s already starting to bring his pieces in the upper left corner together. Silver can stem the tide somewhat with F1-F2, forming a line on F2, F3 and threatening Gold’s stone on F5.
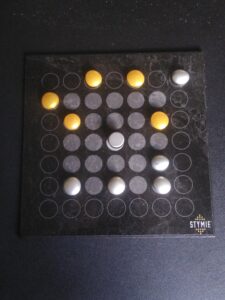
Figure 2
There are many possible ways for Gold to respond to the threat, but the point is Silver was able to establish a threat with a very basic move and unless Gold is able to see a progression at least a few moves ahead, he could already be facing a material deficit, a big momentum swing and a much weaker position overall.
